Greetings from the Garden!
By Bart Streb
 March is a planning month and a time to get a little dirty. We have days of spring-like weather that greet us early in the year and here are some tips to get you started. Put on your old sneakers and pants and let’s get gardening!
Find a Great Location
Think about an area that gets at least six hours of sun; 7 to 8 hours is better. This new site that I am working receives sun from about 11 am until sunset. In the winter, it is protected from the cold north winds by a storage building and warms up well, being uphill slightly from a farm field below it. Since this property has large trees that shade most of it, I chose this area as the best location. The garden is about 15 feet by eight feet, which is large enough to grow a surprising amount of produce. This soil has never been turned or worked in any way. I dug a few test holes, and it appeared to be a loose, loamy soil. If your site is similar in size try some test holes. If it appears clay- based, consider renting a tiller for half a day. Find a neighbor or two to split the cost.
Work with the Soil – Double Dig the Garden
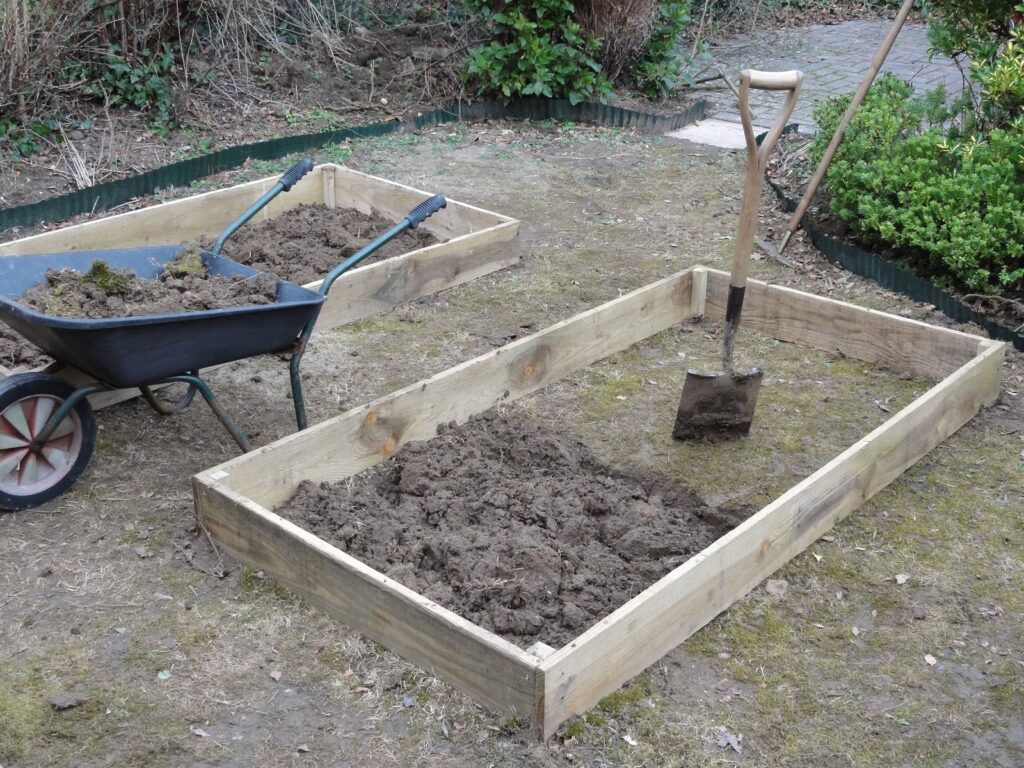
Now is a good time to break up the soil, exposing it to the elements and burying the green matter on top when you turn it under. Start adding compost or manure if you have it. You can buy bags at the local hardware stores. I am starting a new garden in a site that I have not worked in yet, and the soil is being turned now. I dig out a row on one end, put it in the wheelbarrow, then flip the soil beside the trench upside down so the green matter on top is turned under. Repeat this process throughout the whole bed, and at the end, there should be a trench to add the soil from the wheelbarrow. There, all turned over! (This can be back breaking so take your time, enlist some help or rent a tiller!). You have double dug your garden!
Prepare the Site
Consider making some raised beds using one inch by six-inch lumber (You can use 2×6 also). Three feet wide is about maximum so you can reach the middle without climbing inside and compressing the soil. I use free, scrap lumber but a couple of boards from the hardware store won’t set you back too badly. I have had great results with the raised beds. Properly spacing the frames makes weeding and trimming easy. Remember, a 22-inch mower requires about 25 inches of room between rows if you plan on having multiple beds and mowing between. I spaced mine closer and used a weed trimmer, cutting right up against the boards. In any case, leave at least 18 inches for a foot path between them. It’s best to orient the beds in an east-west direction, so the sun does not shade the shorter plants. I plant my taller rows near the rear of the garden on the north side. Nothing frames the back of a summer garden like a row of sunflowers. Raised beds give a neat appearance to the garden as you incorporate it into your landscaping. There is no real reason to make them taller than a 6-inch board, but material type and height is up to you and the design that best fits the yard. I have excellent results with a 6-inch-high garden bed. The higher the bed, the more soil you need to fill them up!
Plant Cold-Hardy Vegetables
March is the month to plant some cold-hardy vegetables like greens, potatoes, peas and turnips or other root crops. Most seed packs instruct you to plant as early as the ground can be worked; however, our soil can be worked all winter, and I find that even the cold-hardy plants really don’t grow well until after April 1 in the open garden. It really depends on how cold the winter was and how warm the early spring is. Soil temperature is the key and it stays cool until our nights start getting out of the 40’s. Each year is different. Our last frost is not until mid/late April, so be patient. There is still much preparation before seeds go in!
Good gardening!
Bart Streb is owner of Real Estate Repair and Restoration, living in Oak Hill of rural Granville Co. with his wife, chickens and rabbits on their farmstead. Learn more about him at https://www.linkedin.com/in/bartstreb


